IDEA must be installed before creating a new user
IDEA - Installation
FCDS IDEA is only for Windows computers. Mac/Apple computers are not supported.
Existing users do NOT need to create a new account
FCDS now has a new Loadable App for your computer. When you finish loading the App, you will have an icon on your desktop and in your start menu.
Installation of the New FCDS IDEA app will allow you to submit abstracts, upload submissions, connect to the online education system (FLccSC), access the DREAMS system and various reports. It has the look, feel and functionality you have experienced using the web based IDEA system.
Click on your browser type to get specific instructions.
This process was done on a Windows 10 operating system using Firefox. Different operating systems and/or browsers will result in slightly different steps.
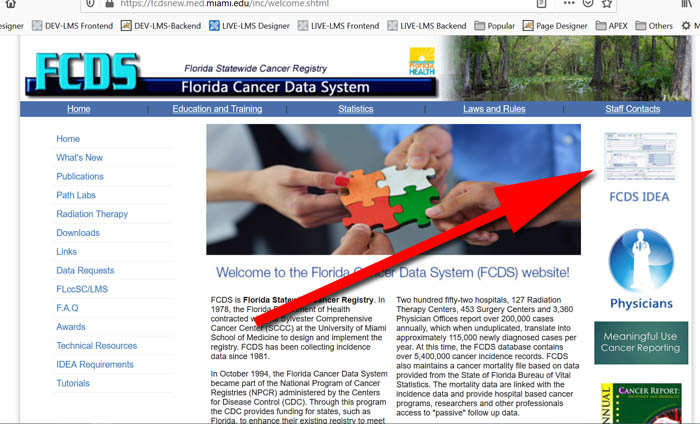
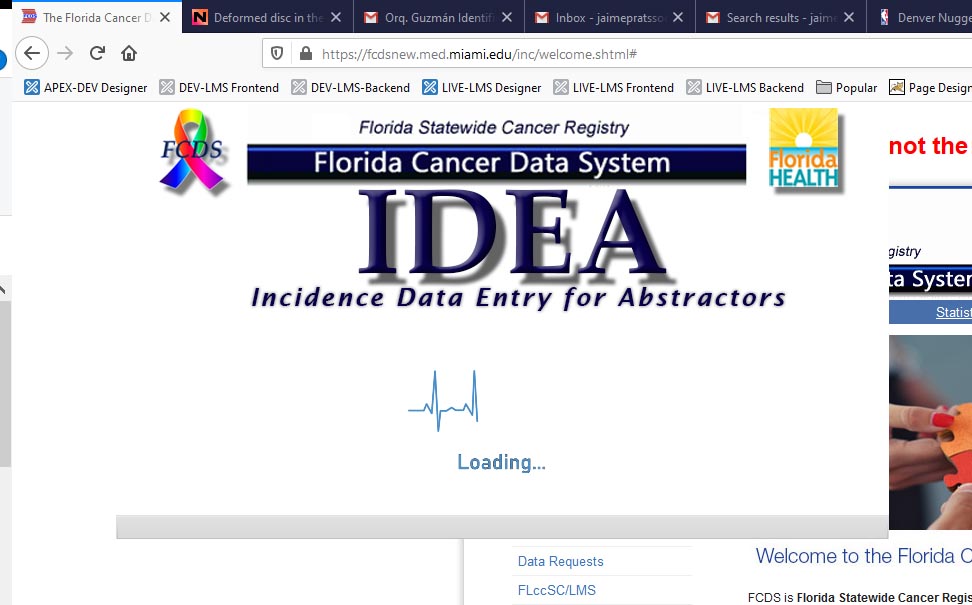
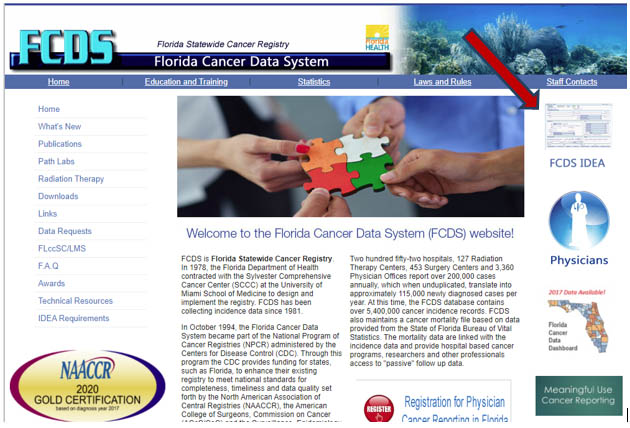
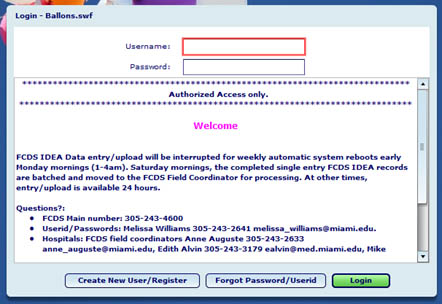
Step 1: Click on the FCDS IDEA icon on the top right side of the IDEA web page.
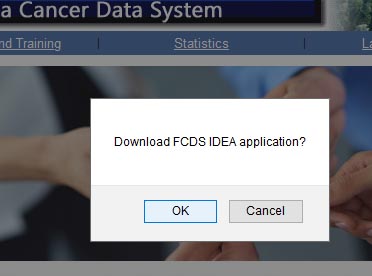
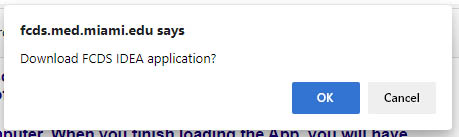
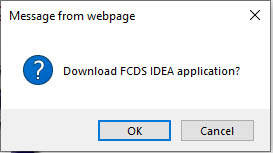
Step 2: The first step of the process will ask you to “Download FCDS IDEA Application”. By answering “OK” you are acknowledging and permitting the FCD IDEA application to be loaded onto your local hard drive. Answering “Cancel” will end the installation process.
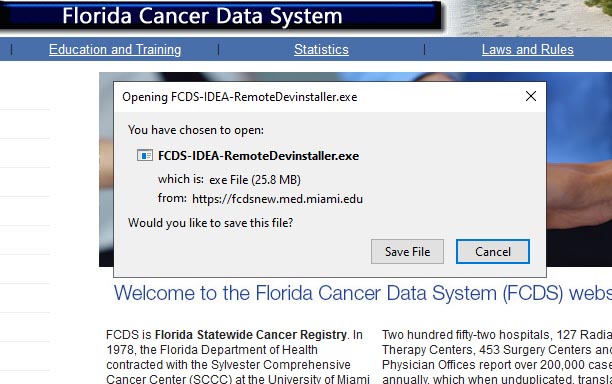
Step 3: At this point the FCDS IDEA installer is requesting to be saved on your local hard drive. Click “Save File” to continue the process. Clicking “Cancel” will end the installation process.
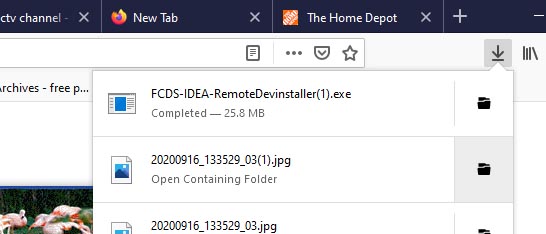
Step 4:Double click the file “FCDS-IDEA-Liveinstaller.exe. This will start the download of all necessary modules necessary to run the FCDS IDEA application.
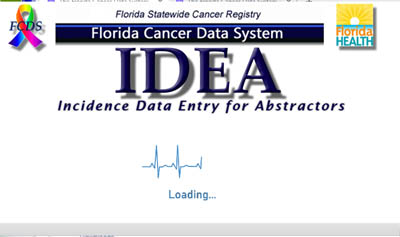
Step 5:You will see this image as the application loads.
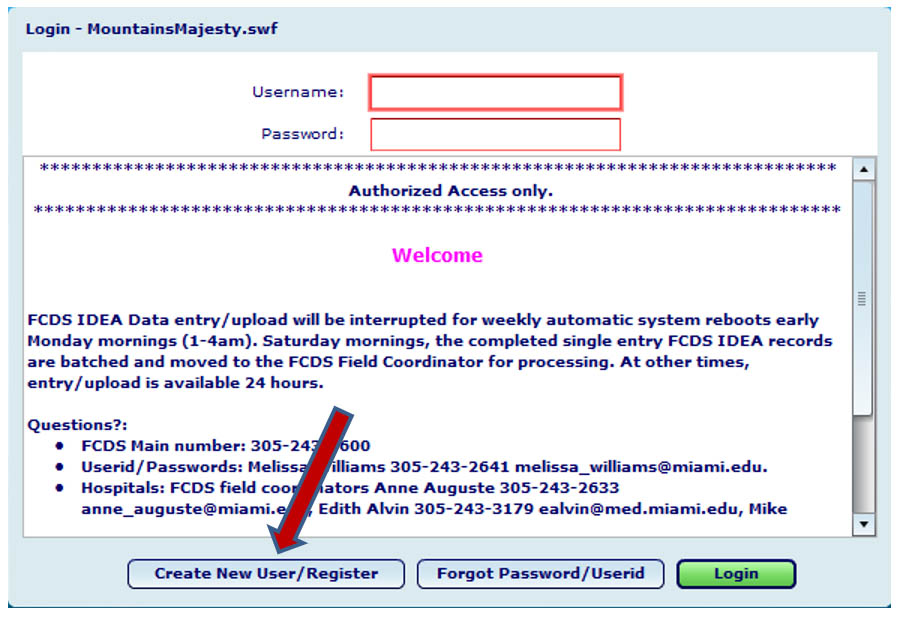
Step 6:This is the IDEA login panel. Enter you Username and Password as you normally would.

Note: You will have a new icon on your desktop. It will look like this. To access FCDS IDEA you will no longer need to access the IDEA web site. You can simply click the FCDS IDEA icon on you desktop.

This process was done on a Windows 10 operating system using Microsoft Edge. Different operating system and/or browsers will result in slightly different steps.
Step 1: Click on the FCDS IDEA icon on the top right side of the IDEA web page.
Step 2: The first step of the process will ask you to “Download FCDS IDEA Application”. By answering “OK” you are acknowledging and permitting the FCD IDEA application to be loaded onto your local hard drive. Answering “Cancel” will end the installation process.
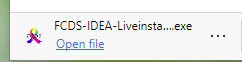
Step 3: At the bottom left of your screen you will see a box that says: FCDS-IDEA-Liveinstaller.exe. Click ‘Open File’ and it will start the installation of the FCDS IDEA application.

Then this panel is displayed indicating that the app is being loaded

Step 4:The app is installed on your machine and all updates are processed. You can now log in.
Note: The installation procedure creates an icon on your desk top that looks like this. You can click on this from now on to access FCDS Idea.
This process was done on a Windows 10 operating system using Internet Explorer. Different operating system and/or browsers will result in slightly different steps.
Step 1: Click on the FCDS IDEA icon on the top right side of the IDEA web page.

Step 2: The first step of the process will ask you to “Download FCDS IDEA Application”. By answering “OK” you are acknowledging and permitting the FCD IDEA application to be loaded onto your local hard drive. Answering “Cancel” will end the installation process.
Step 3: At the bottom of your screen you will see a box that asks if you want to run or save FCDS-IDEA-Liveinstaller.exe. Click ‘Run’ and it will start the installation of the FCDS IDEA application.


Then this panel is displayed indicating that the app is being loaded
Step 4:The app is installed on your machine and all updates are processed. You can now log in.

Note: The installation procedure creates an icon on your desk top that looks like this. You can click on this from now on to access FCDS Idea.

This process was done on a Windows 10 operating system using Google Chrome. Different operating system and/or browsers will result in slightly different steps.
Step 1: Click on the FCDS IDEA icon on the top right side of the IDEA web page.

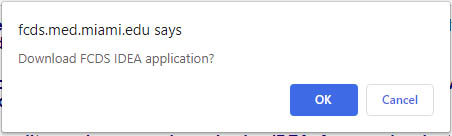
Step 2: The first step of the process will ask you to “Download FCDS IDEA Application”. By answering “OK” you are acknowledging and permitting the FCD IDEA application to be loaded onto your local hard drive. Answering “Cancel” will end the installation process.
Step 3: At the bottom left of your screen you will see a box that indicates that FCDS-IDEA-Liveinstaller.exe has been saved. Click the box and it will start the installation of the FCDS IDEA application.

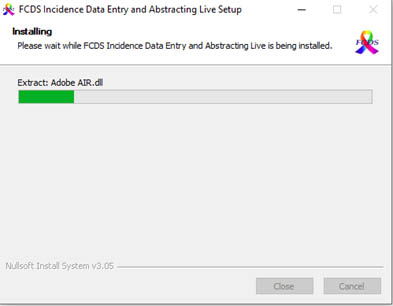
Then this panel is displayed indicating that the app is being loaded

Step 4:The app is installed on your machine and all updates are processed. You can now log in.

Note: The installation procedure creates an icon on your desk top that looks like this. You can click on this from now on to access FCDS Idea.

Safary Browser not Supported
FCDS IDEA is only for Windows computers.
Mac/Apple computers are not supported.
In order to use the current version of IDEA you must use any of the following
browsers:Internet Explorer / Firefox / Microsoft Edge or Google Chrome
Opera Browser not Supported
In order to use the current version of IDEA you must use any of the following
browsers:Internet Explorer / Firefox / Microsoft Edge or Google Chrome
New User
If you already have an IDEA username and password you do NOT have to create a new one. These instructions are for all users who are NOT physicians. Individuals who intend to use the FCDS IDEA system include Abstractors, Data Request users, Pathology users and Radiology Therapy users.
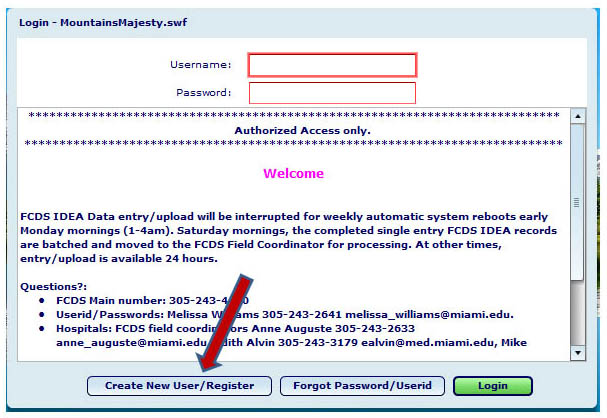
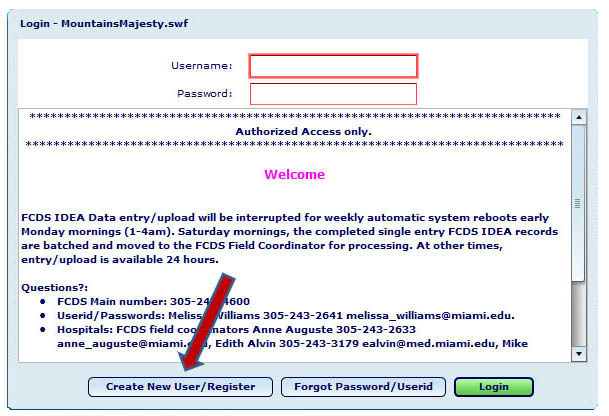
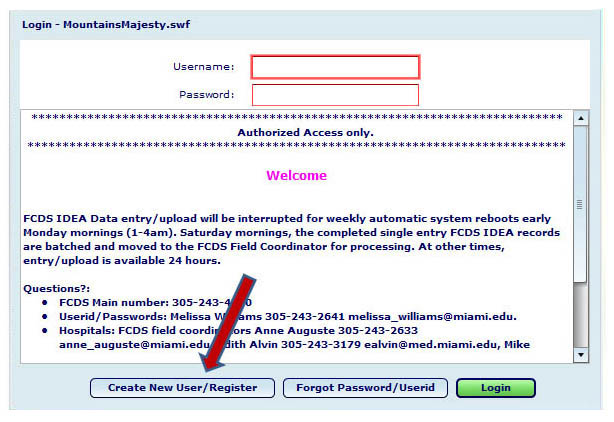
Step 1: After you have completed the IDEA Installation and you are at the Login screen, click “Create New User/Register” button to create a new user.
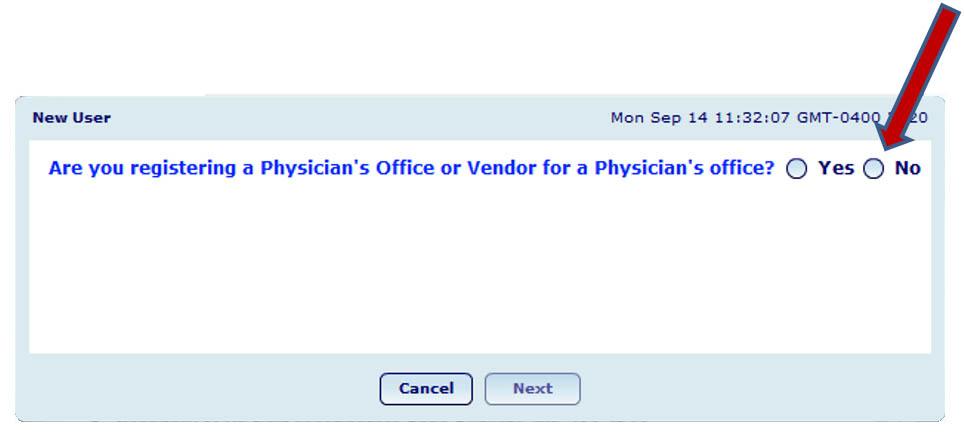
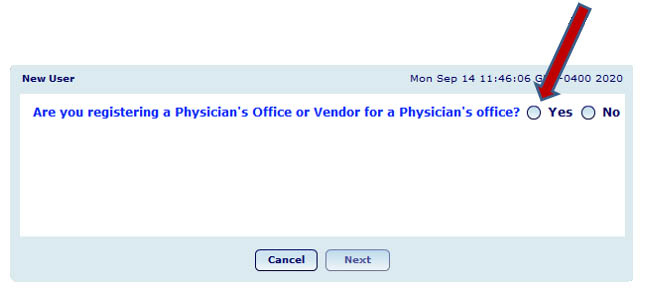
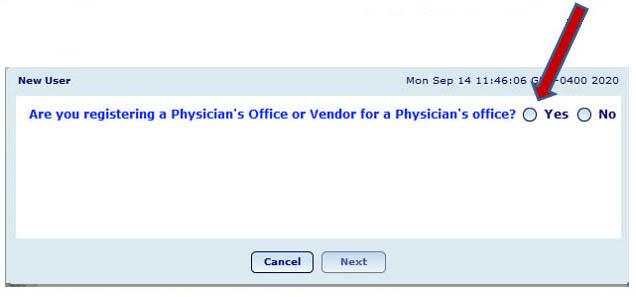
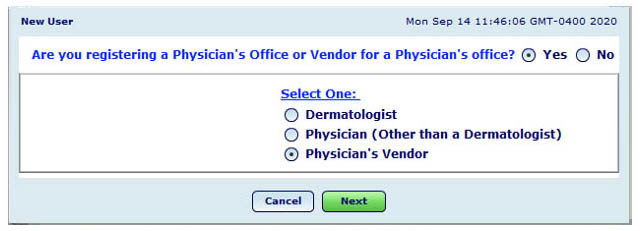
Step 2: You will be asked if you are a Physician’s Office or a Vendor for a Physician’s office. Click the radio button next to “No”.
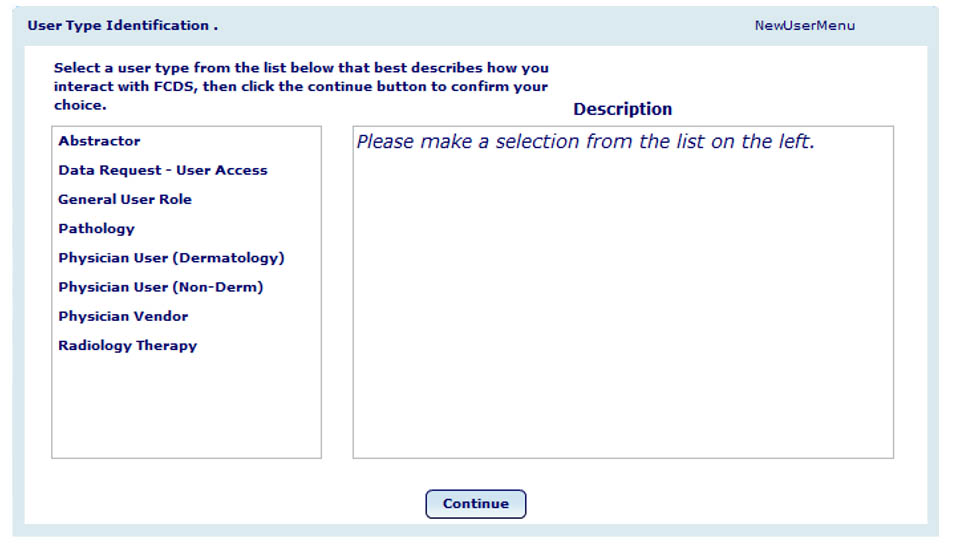
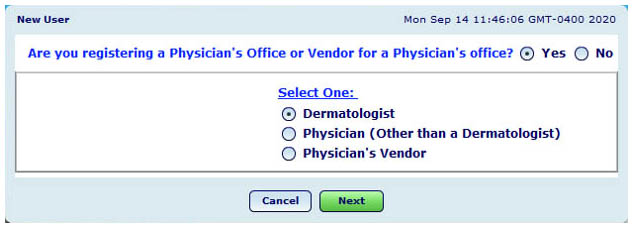
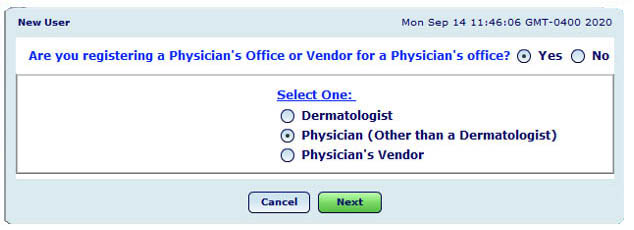
Step 3: Then next panel will ask you to select what type of user you will be. In other words how you intend to use the FCDS IDEA system. Click on the value on the left and then click “Continue”. You must select one to begin with. Once your user has been created you will be able to add additional User types.
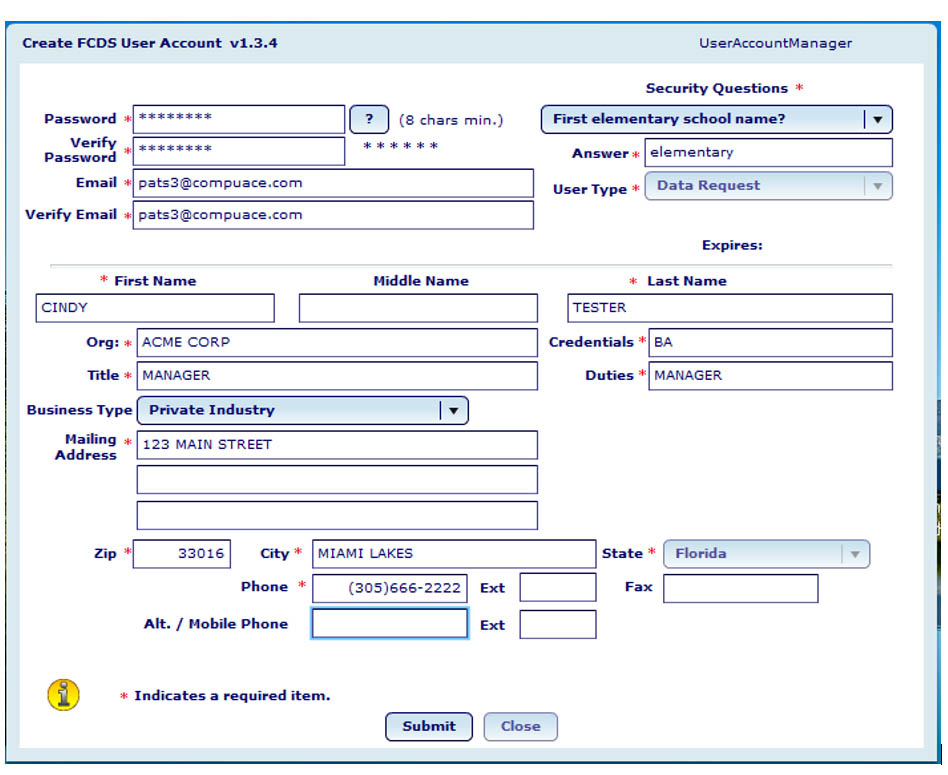
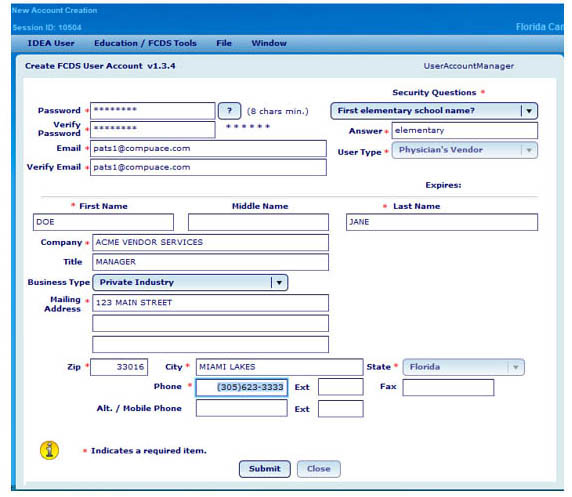
Step 4: After you have selected a user type and click continue, you will be prompted to create a user. The red stars indicate required fields. In this example, I have selected Data Request as the User type. Once you have logged in you can select additional user types.
Click “Submit” when you have completed the form.
Step 5: For Data Request Users Only you will need to upload you Curriculum Vitae(CV)/Resume.

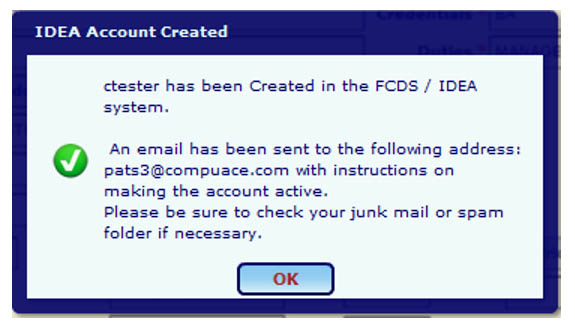
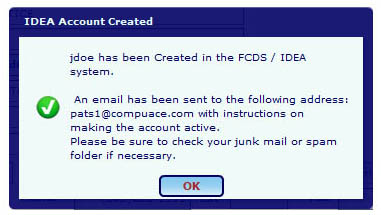
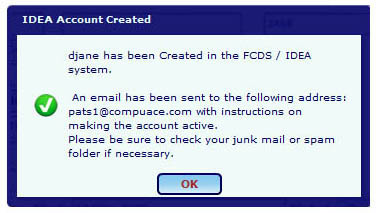
Step 6: After you have clicked “Submit”, you will get this message that will inform you that an email has been sent to your account. It is essential that you locate that email and click the link provided. This will activate your account.
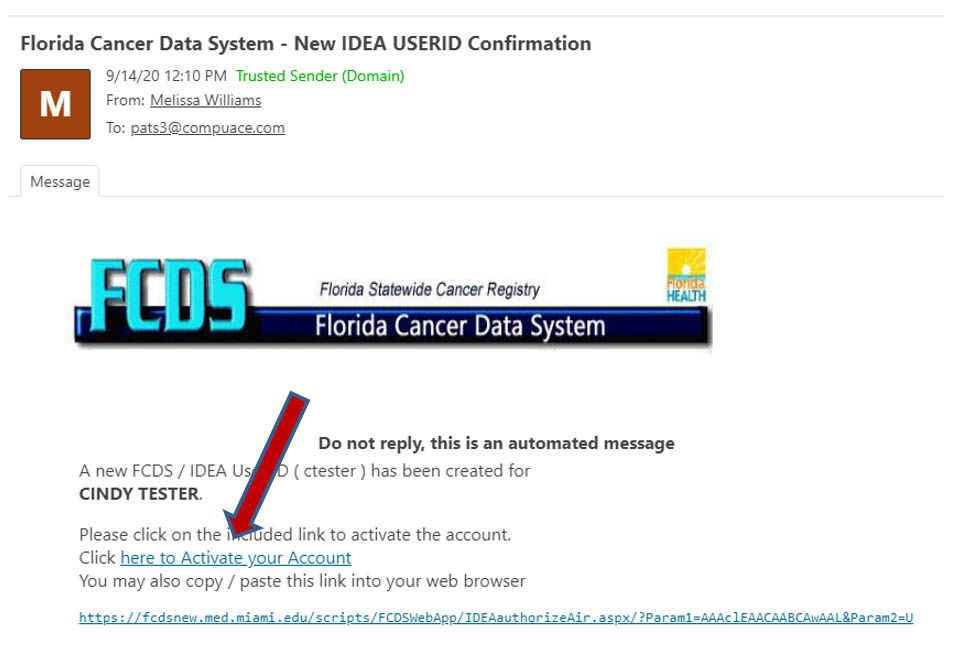
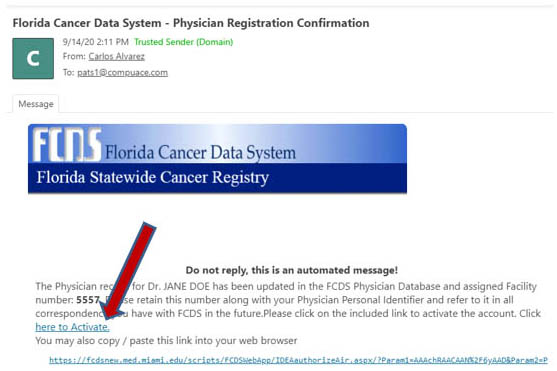
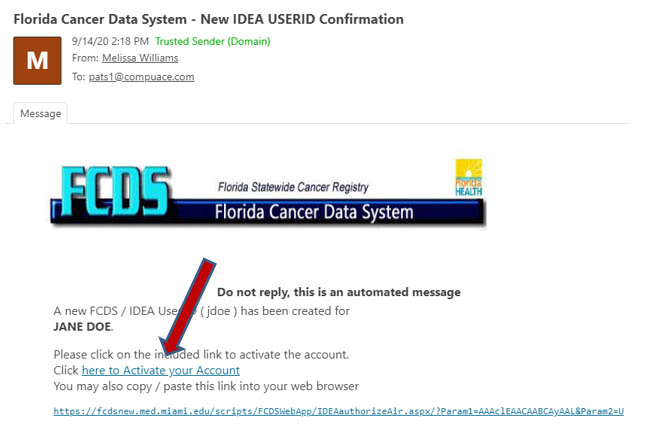
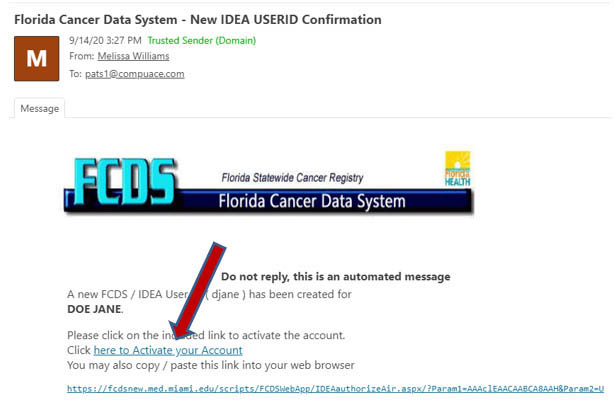
Step 7: An email similar to this will be in your in box (be sure to check your Junk or spam folders). Click the link labelled “Click here to Activate your Account”.
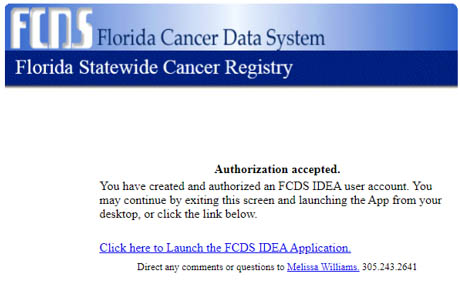
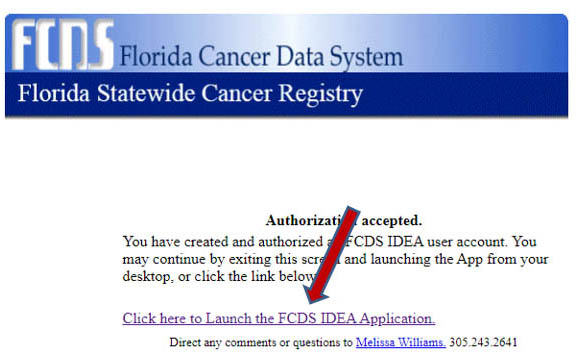
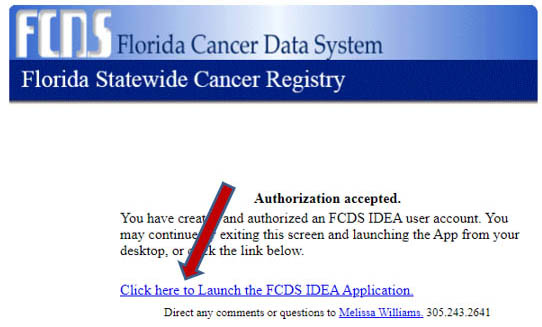
Step 8: This Message will display in a browser window. Click on the “Click here… “ link to launch the FCDS IDEA application.

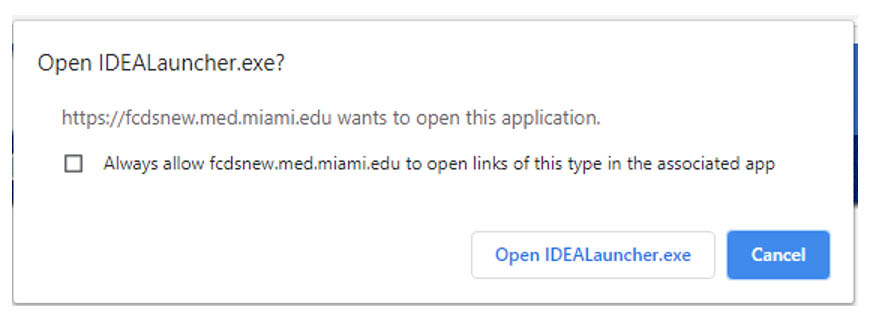
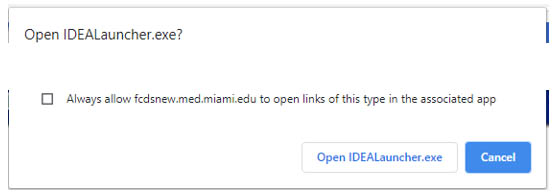
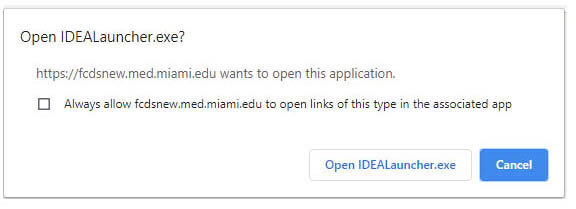
Step 9: Once you click on the link you will be asked this question. If you click the check box you will not be asked this question each time you run the FCDS IDEA application. Click “Open IDEALauncher.exe” to begin the IDEA application.
New User/Registration – Dermatology Physician
These instructions are for all Dermatology Physicians who are creating a user to register and report cases to FCDS. Cases can be reported either using a single entry process or uploaded.
Step 1: After you have completed the IDEA Installation and you are at the Login screen. Click “Create New User/Register” to create a new user. NOTE: Be sure you have your Physician Personal Identifier (PPID) before you begin the registration process. If you don’t have your PPID please call (305) 243-4600 and request one.
Step 2: You will be asked if you are a Physician’s Office or a Vendor for a Physician’s office. Click the radio button next to “Yes”.
Step 3: You must select what type of physician you are registering. Select Dermatology and then click “Next”.
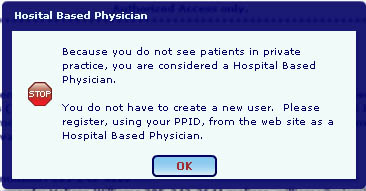
Step 4: You will be asked if this physician sees patient in private practice.
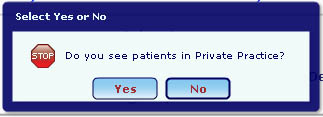
If you select “No”, you are indicating that you do not see patient in private practice and are considered a Hospital Based Physician. Hospital Based physicians need to register using the PPID given to them by FCDS via the web site. Hospital Based Physicians do not need to create a user and password.

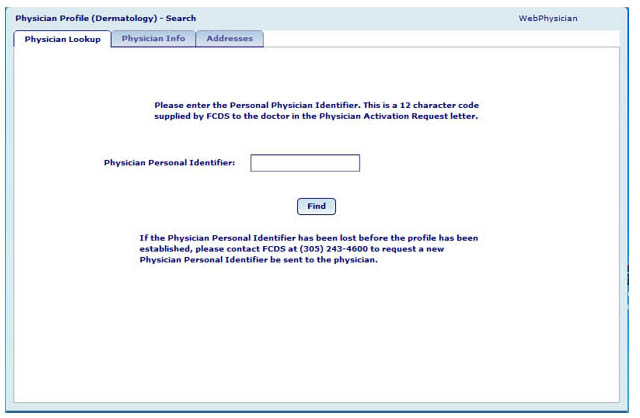
If you select “Yes”, enter the Physician Personal Identifier (PPID) and click “Find”.
Step 5: Enter the Physician Personal Identifier (PPID) and click “Find”.
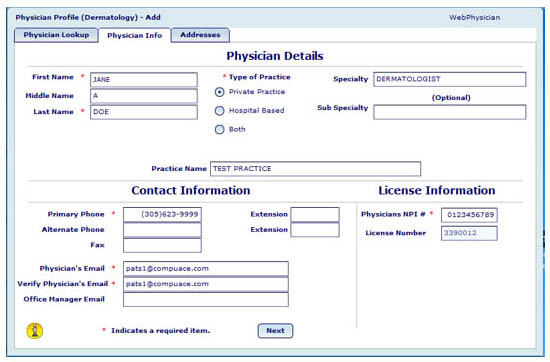
Step 6:Fill out the Dermatology Form:
The red stars indicate required fields and then click the “Next” button.
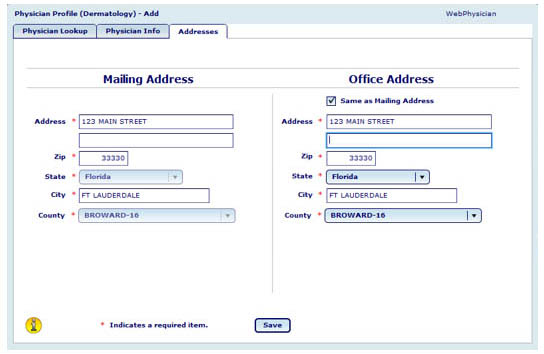
Step 7: Fill out the Mailing Address and Office address sections and click “Save”.
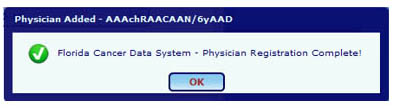
Step 8: This is the “Physician Added” Pop up message that displays on the screen notifying you the registration is complete. (See instruction below to continue this process once you click “OK”.)
Step 9: An email is sent confirming the registration.
Step 10: This Message will display in a browser window. Click on the “Click here… “ link to launch the FCDS IDEA application.
Step 11: Once you click “OK” to the “Physician Added” pop up, this message will be displayed asking you if you would like to create an IDEA account, edit the physician record you just entered or simply Exit and stop working.
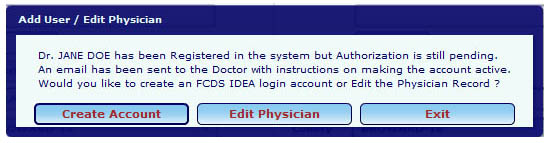
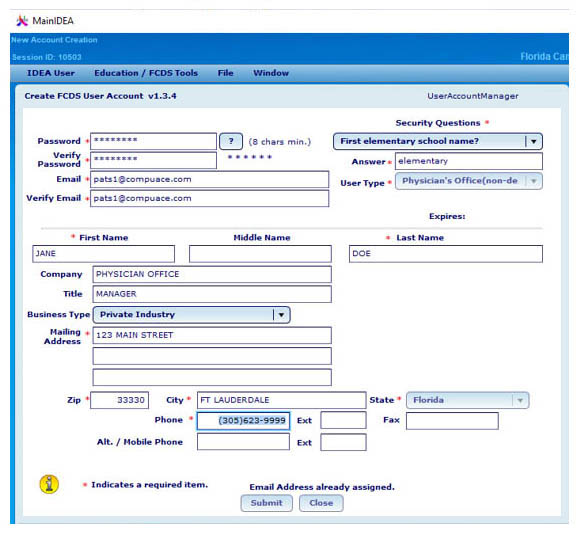
Step 12: To create a FCDS IDEA user account for this Dermatologist please click the “Create Account”.
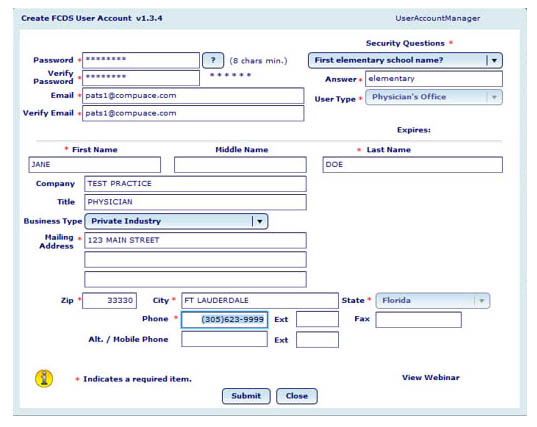
The Create FCDS User Account panel will be displayed. Please fill out the information requested. The red stars indicate all required data. Click “Submit” when you are done.
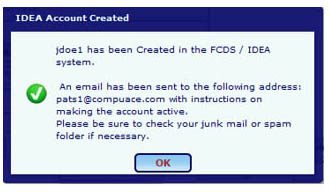
Step 13: After you have clicked “Submit”, you will get this message that will inform you that an email has been sent to your account. It is essential that you locate that email and click the link provided. This will activate your account.
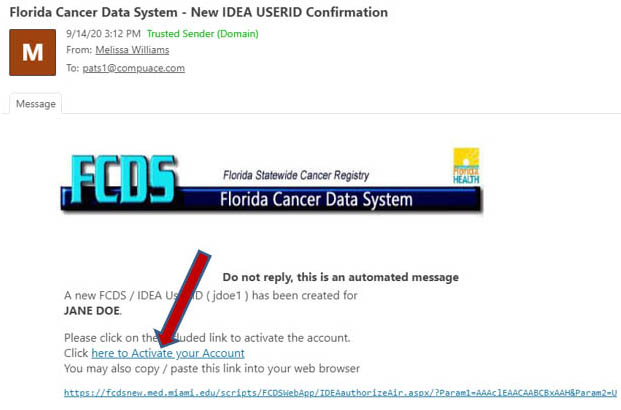
Step 14: An email similar to this will be in your in box (be sure to check your Junk or spam folders). Click the link labelled “Click here to Activate your Account”.
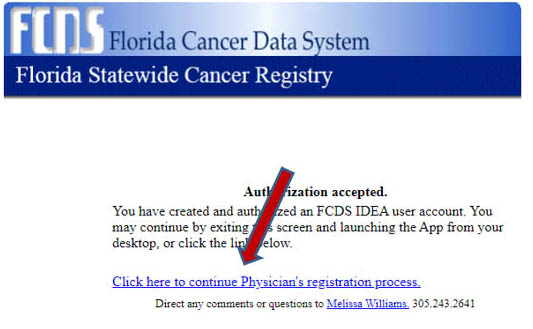
Step 15: This Message will display in a browser window. Click on the “Click here… “ link to launch the FCDS IDEA application.
Step 16: Once you click on the link you will be asked this question. If you click the check box you will not be asked this question each time you run the FCDS IDEA application. Click “Open IDEALauncher.exe” to begin the IDEA application.
Step 17:You should have an Icon on your desk top that looks like this. As long as you have an internet connection, this link will connect you to FCDS IDEA.

New User/Registration – Non Dermatology Physician
These instructions are for Physicians who are NOT dermatologists. The registration process creates a user in order to report cancer cases to FCDS. Cases can be reported either manually using a single entry process or uploaded in batch format.
Step 1: After you have completed the IDEA Installation and you are at the Login screen. Click “Create New User/Register” to create a new user. NOTE: Be sure you have your Physician Personal Identifier (PPID) before you begin the registration process. If you don’t have your PPID please call (305) 243-4600 and request one.
Step 2: You will be asked if you are a Physician’s Office or a Vendor for a Physician’s office. Click the radio button next to “Yes”.
Step 3: You must select what type of physician you are registering. Select Physician (Other than a Dermatologist) and then click “Next”.
Step 4: You will be asked if this physician sees patient in private practice.

If you select “No”, you are indicating that you do not see patient in private practice and are considered a Hospital Based Physician. Hospital Based physicians need to register using the PPID given to them by FCDS via the web site. Hospital Based Physicians do not need to create a user and password.
Step 5: If you select "Yes", you will be prompted to create an FCDS user account.
Step 6: Fill out the Create FCDS User Account panel. The red stars indicate required fields. Click "Submit" when you have completed the form. Note: that once you have logged in you can select additional user types.
Step 7: After you have clicked “Submit”, you will get this message that will inform you that an email has been sent to your account. It is essential that you locate that email and click the link provided. This will activate your account. When you click “OK” the FCDS IDEA modules will all close.
Step 8: An email similar to this will be in your in box (be sure to check your Junk or spam folders). Click the link labelled “Click here to Activate your Account”.
Step 9: This Message will display in a browser window. Click on the “Click here… “ link to launch the FCDS IDEA application.
Step 10: Once you click on the link you will be asked this question. If you click the check box you will not be asked this question each time you run the FCDS IDEA application. Click “Open IDEALauncher.exe” to begin the IDEA application.
New User – Vendor Registration
These instructions are for Physician’s Vendors who intend to upload cancer cases to FCDS. The registration process creates a user in order to report cancer cases to FCDS. Cancer cases will be uploaded via batch submissions.
Step 1: After you have completed the IDEA Installation and you are at the Login screen. Click “Create New User/Register” to create a new user.
Step 2: You must select what type of physician you are registering. Select Physician’s Vendor and then click “Next”.
Step 3: After you have clicked “Submit”, you will get this message that will inform you that an email has been sent to your account. It is essential that you locate that email and click the link provided. This will activate your account. When you click “OK” the FCDS IDEA modules will all close.
Step 4:An email similar to this will be in your in box (be sure to check your Junk or spam folders). Click the link labelled “Click here to Activate your Account”.
Step 5: This Message will display in a browser window. Click on the “Click here… “ link to launch the FCDS IDEA application.
Step 6: Once you click on the link you will be asked this question. If you click the check box you will not be asked this question each time you run the FCDS IDEA application. Click “Open IDEALauncher.exe” to begin the IDEA application.

Step 7: You should have an Icon on your desk top that looks like this. As long as you have an internet connection, this link will connect you to FCDS IDEA.

Updating Passwords
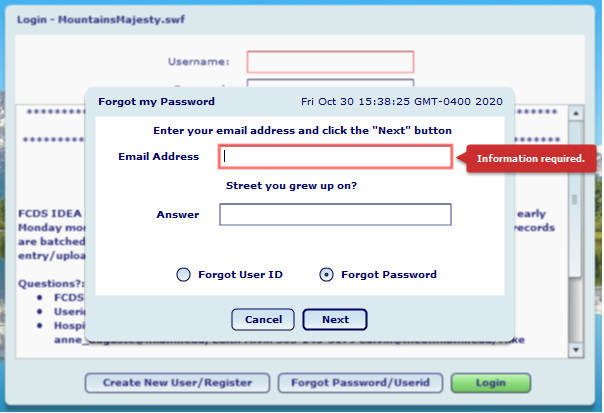
Step 1: From the login screen, click the "Forgot Password/Userid" button (same as before). Enter your email address and security question and click Next:
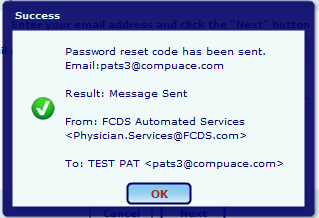
Step 2: This message will pop up asking you to find the email sent by FCDS to enter a Reset Code.
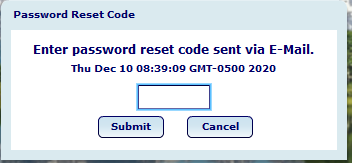
Step 3: When you click the OK button, this panel will appear:
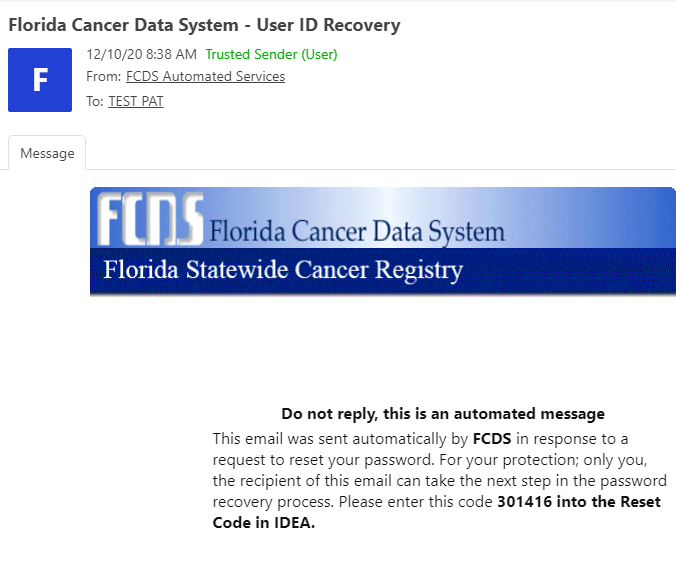
Step 4: The email looks like this. Notice the embedded Code (301416) Enter that code in the panel on the FCDS IDEA screen.:
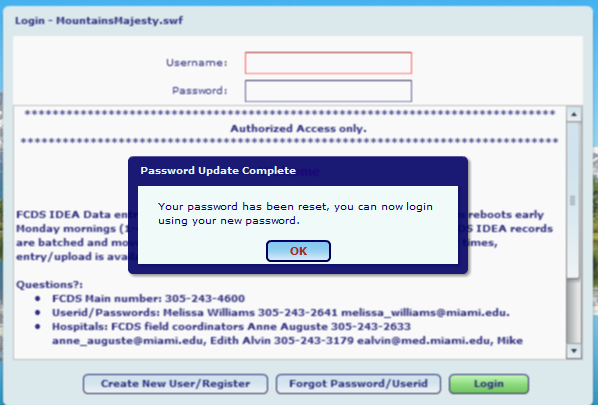
Step 5: Once the Reset code is entered then the user is asked to enter a New Password.

Step 6: Then the user will be prompted to sign in with the new password:
New Out of State User
If you already have an IDEA username and password you do NOT have to create a new one. These instructions are for all New Out of State users.
Step 1: After you have completed the IDEA Installation and you are at the Login screen, click “Create New User/Register” button to create a new user.
Step 2: You will be asked if you are a Physician’s Office or a Vendor for a Physician’s office. Click the radio button next to “No”.
Step 3: Then next panel will ask you to select what type of user you will be. For Out of State users, Click “General User Role” and then click “Continue”.
Step 4: After you have selected a user type and click continue, you will be prompted to create a user. The red stars indicate required fields. In this example, I have selected Data Request as the User type. Your User Type will read General User.
Click “Submit” when you have completed the form.
Step 5: Notify Carlos Alvarez, OMD, PA, BBA, Field Coordinator, calvarez2@med.miami.edu (305) 243-2638 that you have registered. He will verify with you which state you will be affiliated with and grant you access to the state for both uploading data and downloading data.
Step 6: After you have clicked “Submit”, you will get this message that will inform you that an email has been sent to your account. It is essential that you locate that email and click the link provided. This will activate your account.
Step 7: An email similar to this will be in your in box (be sure to check your Junk or spam folders). Click the link labelled “Click here to Activate your Account”.
Step 8: This Message will display in a browser window. Click on the “Click here… “ link to launch the FCDS IDEA application.
Step 9: Once you click on the link you will be asked this question. If you click the check box you will not be asked this question each time you run the FCDS IDEA application. Click “Open IDEALauncher.exe” to begin the IDEA application.
Step 10: Log into the FCDS IDEA application using the icon on your desktop. Once in IDEA, select the menu item Full Abstract Processing / State Data Exchange. You will see an option to upload an XML file into FCDS or download an XML file containing records from FCDS.